Live Yoga Teachers
SUP Yoga
What is SUP yoga?
SUP stands for stand-up paddleboard (or stand-up paddleboarding).
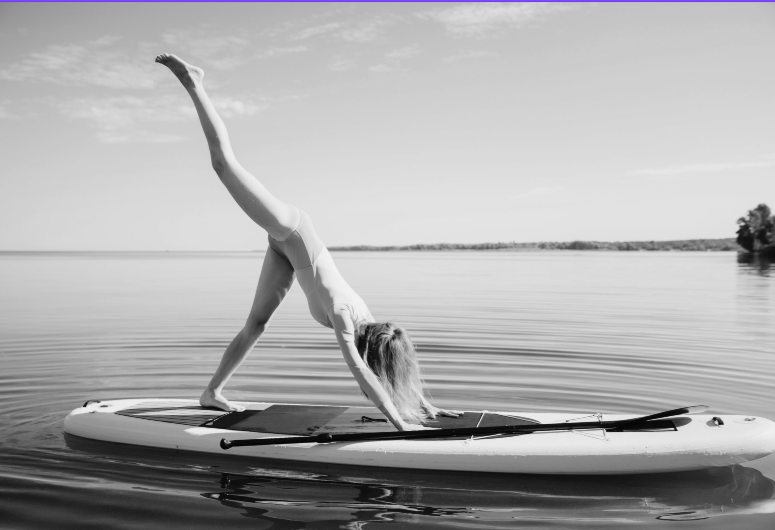
SUP yoga is yoga practised on a stand-up paddleboard, floating on calm water. You take poses you already know — or are learning — and do them on a board instead of a mat. The water moves a little underneath you, so the practice asks for more balance and a bit more focus than dry land does.
With Live Yoga Teachers, you join a SUP class live from wherever you're floating — a still lake, a sheltered bay, a quiet stretch of river — and follow your teacher in real time. Same live class, different mat.
Who is it for?
SUP yoga suits you if you're comfortable in and around water and can swim. You don't need to be an experienced yogi, and you don't need to be athletic. Most poses start on your hands and knees or lying down, low and close to the board, which is where beginners spend most of their first class anyway.
It's worth skipping if you're not confident swimming, or if being on open water makes you anxious rather than curious. Everything you'd practise on the water, you can also practise at home on a mat — so there's no rush and nothing to prove.
Benefits of SUP yoga
The water does something a mat can't: it never holds perfectly still. Because the board is always making small adjustments, your body does too. Over a class, that builds real balance and steady core strength — the quiet, deep kind, not the crunch kind.
It also sharpens your focus. On the water, your attention naturally narrows to your breath and the next movement, because that's what keeps you steady. Many students find that's the part they come back for.
And then there's the setting. Practising outdoors, on the water, in the open air, tends to leave people calmer than they expected. That's not a claim about transformation — it's just what being on the water does.
What props do you need?
You'll want:
- A paddleboard. A wide, stable board is best for yoga — look for one that's thick and broad rather than a narrow racing board. Many people use an inflatable SUP, which is forgiving and easy to store. If you're renting or borrowing, ask for a "yoga" or "all-round" board.
- An anchor. A small anchor keeps your board from drifting mid-pose so you can settle and follow the class. This is the one piece people most often forget.
- A paddle. For getting out to your spot and back. Lay it flat along the board, out of your way, once you've anchored.
- A buoyancy aid or life vest. Wear it, or keep it within reach on the board.
- A leash. Attaches you to the board so it stays close if you come off.
- Your phone or tablet, wrapped and secured to follow the livestream (see below).
- Water, sun protection, and a towel round it out. You don't need a yoga mat — the board is your mat.
How to secure your phone or tablet for the livestream
Your device is your window into the live class, and it's floating on water, so protect it properly before you paddle out.
Use a fully waterproof case or pouch rated for submersion — a proper IP68 dry case or a sealed floating pouch, not a splash-resistant sleeve. Seal it and check the closure twice on dry land. Many pouches are clear on both sides, so the touchscreen still works through the plastic and you can see the class.
Then keep it from drifting. Choose a floating case or clip it to a leash or lanyard tied to your board's bungee cords or a D-ring, so if it slips it stays with you rather than sinking. Prop it against the board's cargo straps near the front, angled up so you can see and hear your teacher from your hands or from lying down.
A quick test before you leave shore: seal the case, make sure the screen responds through it, and confirm you can hear the audio. Do this every time — a good seal is only good if it's closed properly.
The three most common SUP yoga poses
Tabletop (the starting point). On your hands and knees, hands under shoulders, knees under hips, spread wide across the centre of the board. This is home base on the water — where you'll begin, and where you'll return whenever the board wobbles or you want to reset. Most of a beginner's first class happens here or close to it.
Downward-Facing Dog. From tabletop, tuck your toes and lift your hips up and back into an inverted V. On the board, keep your hands and feet planted wide for a stable base and let your gaze soften. It's the same pose you know from the mat — the water just asks you to grip a little more through your hands and feet.
Headstand. The pose that gets photographed most on the water — and the one to build up to slowly. You set your forearms and the crown of your head down near the centre of the board, lift your hips over your shoulders, and rise into a supported inversion. On an unstable board it demands real core control and a calm, established headstand on land first, so treat it as something to work toward with your teacher rather than a first-class pose. When you're ready, water is a soft place to land.

 Summary
Our SUP Yoga teachers